
The paint systems used on buildings are selected from published performance data, manufacturer’s recommendations, previous experience, and referrals from others. At the manufacturing facility, the raw materials are blended together in specific proportions in a well-controlled environment, and systematic tests of product quality are made throughout the process. Despite the controls exercised over manufacturing, the finished product does not always look or perform as expected. It may lack the desired aesthetics, fail by blistering or peeling, or exhibit other objectionable characteristics. While material defects can lead to poor performance, deficiencies with the coating material itself are typically not the cause of failures. Failures are more commonly associated with the quality of cleaning and painting, problems with the building (moisture intrusion associated with the building envelope), or selection of the wrong product for the expectations.
Of these causes, the most common is associated with the quality of cleaning and painting. Schedules often take precedence over compliance with good painting practice. The building needs to be ready for occupancy, and “it’s just paint.” As a result, the contractor is forced to clean and paint when it’s too cold, too hot, too wet, or when there is insufficient time for proper surface preparation or drying between coats. The recommendations in this article are of little help in those situations. The recommendations are of value however, when the owner wants to optimize the performance of the coating, in both new construction and repaints.
For the purpose of this article, the basic inspections and tests that can be undertaken by the contractor, coating manufacturer, owner, or owner’s representative to verify the quality of cleaning and painting are divided into 4 categories:
- Surface Preparation
- Ambient Conditions for Painting
- Coating Materials and Mixing
- Application Quality – Coverage, Thickness, and Continuity
Surface Preparation
Surface preparation encompasses a number of activities: cleaning the bare substrate; cleaning existing coatings to remove loose, poorly adherent material; creating a surface profile in the case of most metallic surfaces; and removing grease, oil, dust, dirt, and chalk that can interfere with the adhesion of newly applied systems. The requirements differ between steel and concrete substrates.
Steel Substrates
When preparing steel substrates, comprehensive written standards are available from The Society for Protective Coatings (SSPC) that define various grades of cleaning when using hand and power tools, abrasive blast cleaning, and water jetting. The standards address both the preparation of new, bare steel as well as previously painted surfaces.
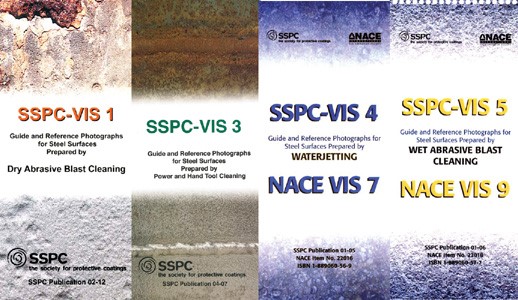
Four sets of reference photographs, which are supplements to the written standards, provide visual examples of the appearance of the cleaning (see Photos No. 1 and No. 2). Each set addresses a different method of preparation:
- SSPC-VIS 1, Guide and Reference Photographs for Steel Surfaces Prepared by Dry Abrasive Blast Cleaning
- SSPC-VIS 3, Guide and Reference Photographs for Steel Surfaces Prepared by Power and Hand Tool Cleaning
- SSPC-VIS 4, Guide and Reference Photographs for Steel Surfaces Prepared by Waterjetting
- SSPC-VIS 5, Guide and Reference Photographs for Steel Surfaces Prepared by Wet Abrasive Blast Cleaning
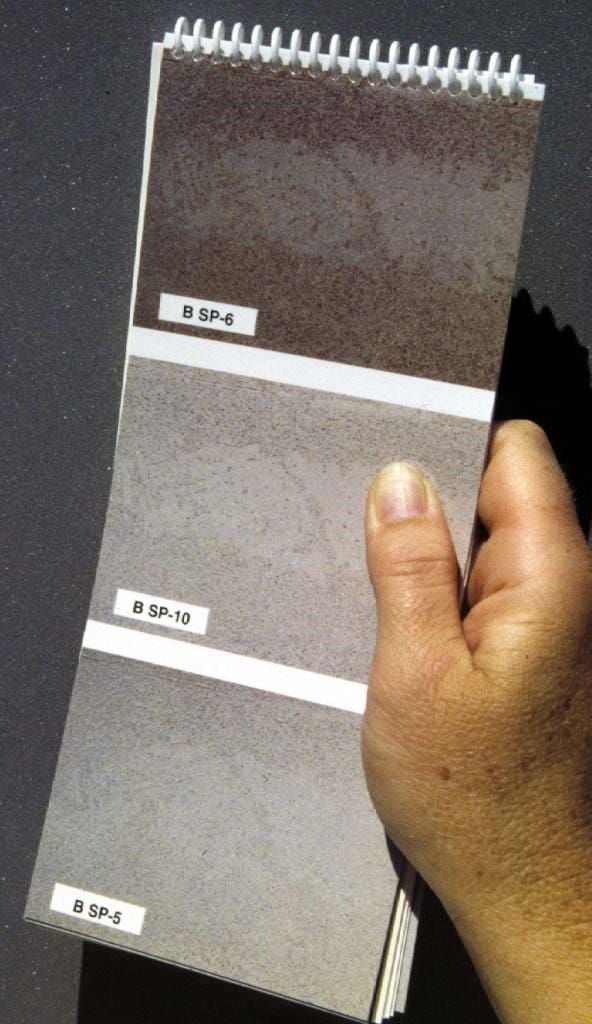
The quality of surface cleaning is assessed visually. Instruments are not available to assist in this inspection. As a result, there is some subjectivity in the assessments. When inspecting the degree of cleaning, the entire surface must be examined as the quality of the work can vary from one square foot to the next. The cleaning and inspection must also be performed in a timely manner because the longer the prepared steel is exposed, the greater is the possibility that rust will form. Specifications typically require that the prepared steel be painted the same day that it is prepared and before rust forms on the surface.
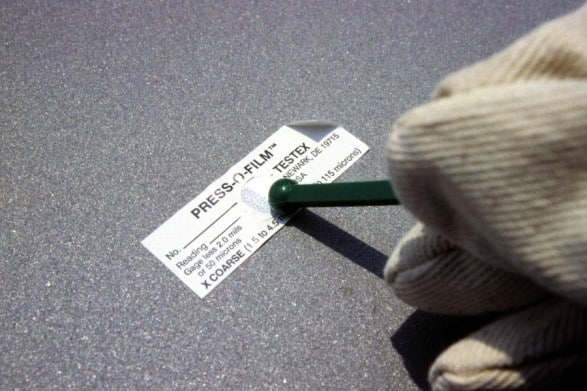
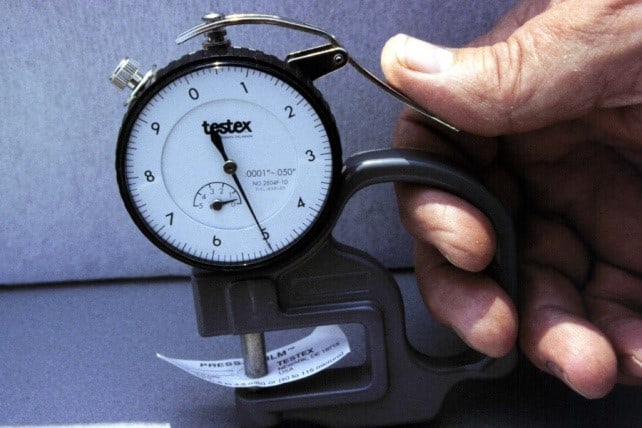
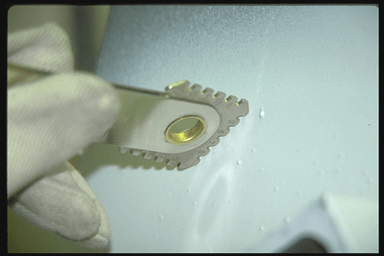
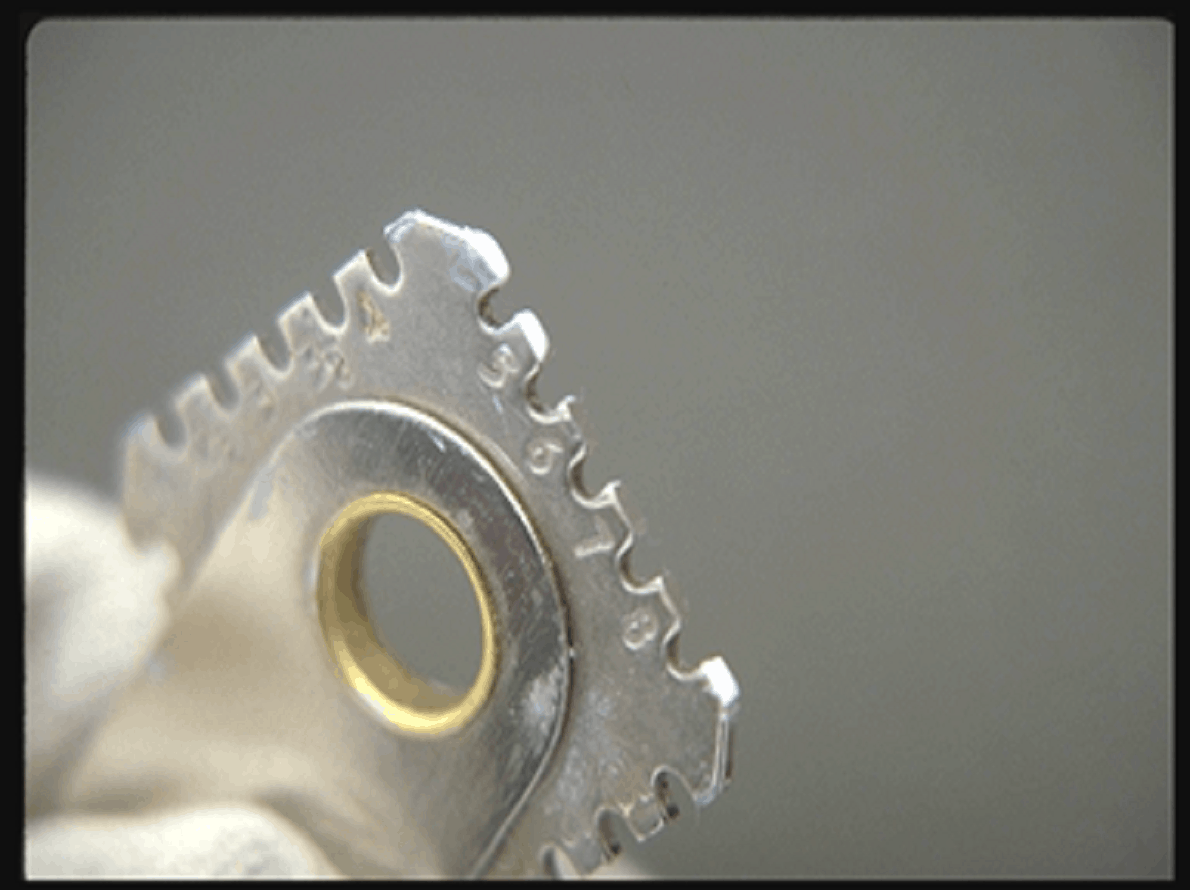
Many specifications and manufacturer’s product data sheets also require that a specific roughness or surface profile be achieved on metallic surfaces in order to enhance the mechanical adhesion of the paint. An insufficient profile can lead to disbonding. This aspect of surface preparation is different than surface cleanliness, and is evaluated using instruments, rather than visually. Common methods for measuring surface profile are described in ASTM D4417, Standard Test Methods for Field Measurement of Surface Profile of Blast Cleaned Steel. The ASTM Standard addresses the use of visual comparators, depth micrometers, and replica tape. The depth micrometers and replica tape can also be used for determining the surface profile of steel cleaned by power tools. In order to use the replica tape, the surface is wiped to remove any loose material, and the tape is rubbed onto the substrate to create a reverse replica of the profile. The replica is measured using a spring micrometer (see Photo No. 3 and No. 4) to determine the profile depth.
By using the above standards, photographs, and instruments, the degree of cleaning on both new and previously painted steel surfaces can be determined.
Concrete Substrates
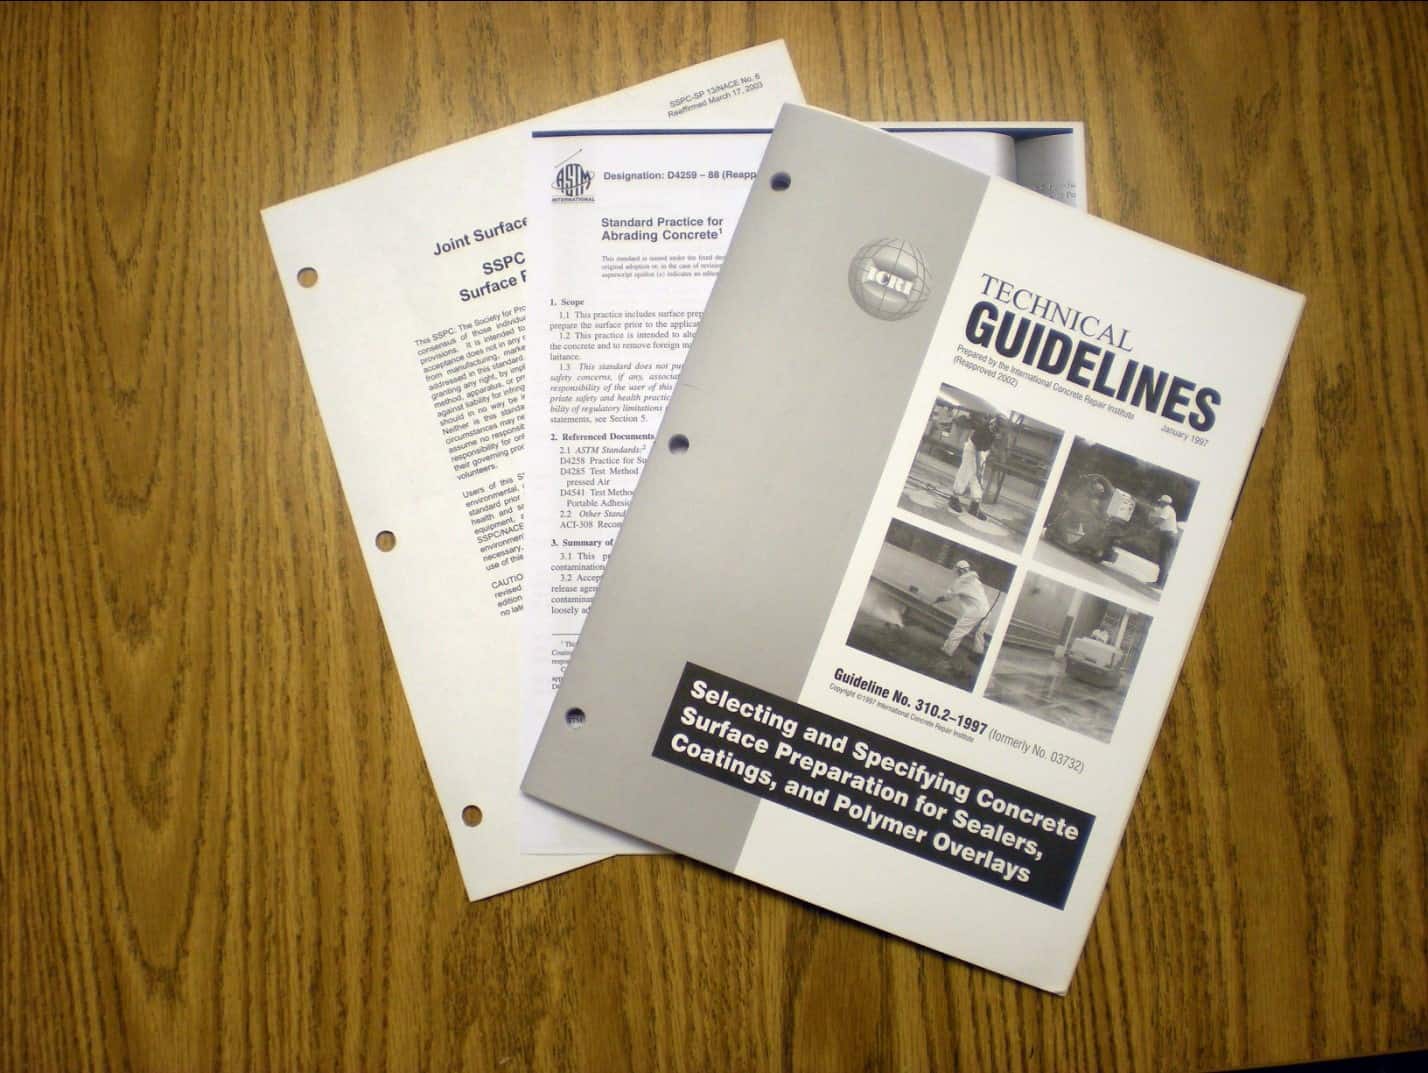
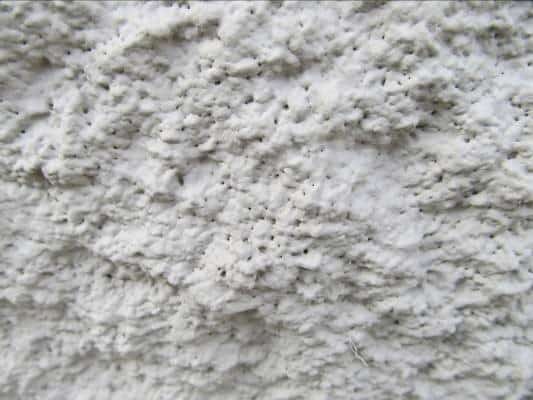
Standards are also available that describe the cleaning of bare concrete, but unlike steel, reference photographs are not available, nor are standards available to describe various degrees of paint removal from previously painted concrete. A review of the standards that address the cleaning of cementitious surfaces can be found in the D+D 2010 article, “Building a Formula for Removing Coatings from Masonry Surfaces.” Standards provided by SSPC, ASTM, NACE (National Association of Corrosion Engineers), and ICRI (International Concrete Repair Institute) are addressed (see Photo No.5).
The acceptance criteria in the standards generally state that the surface should be sound and free of laitance, glaze, efflorescence, and incompatible curing compound, but no real guidance on inspection is provided. As a result, determining the final degree of cleaning of cementitious substrates, both bare and previously painted, involves subjective inspections for loose or poorly adherent material.
Note: SSPC has taken steps to address the shortfalls in the current standards by forming a new committee to develop standards and guides for commercial and institutional cleaning and painting.. One of the initial tasks of the group is to develop surface preparation standards and reference photographs for the cleaning of cementitious substrates, most likely modeled after the SSPC steel cleaning standards and photographs.
Substrate Moisture
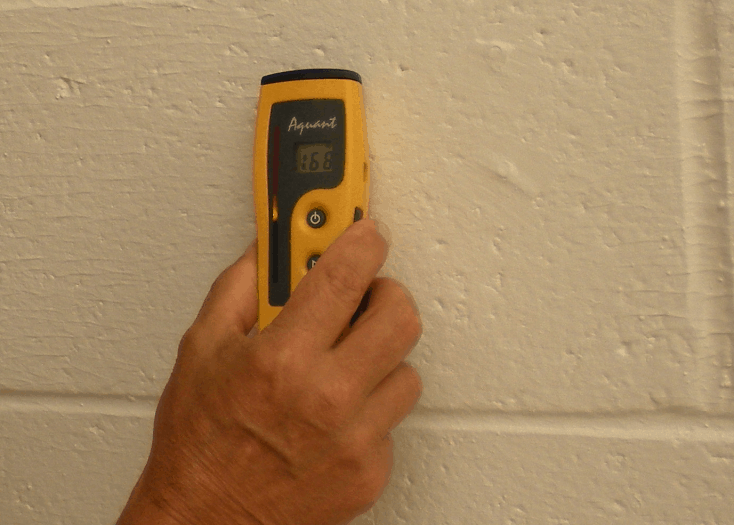
After concrete surfaces are prepared, especially if water is used in the process, the substrate should be examined for the presence of moisture prior to painting. A number of moisture meters are available for determining the presence of moisture in the substrate (see Photo No. 6).
A plastic sheet test can also be conducted in accordance with ASTM D4263, Test Method for Indicating Moisture in Concrete by the Plastic Sheet Method. In this test, the perimeter of a square of plastic measuring 18” x 18” is taped to the surface and allowed to remain in place for 16 hours. The backside of the plastic and the surface of the concrete are then visibly examined for the presence of moisture. If excessive moisture is present in the substrate (visible moisture beneath the plastic) coating performance can be compromised if painting proceeds.
Chalk and Glossy Surfaces
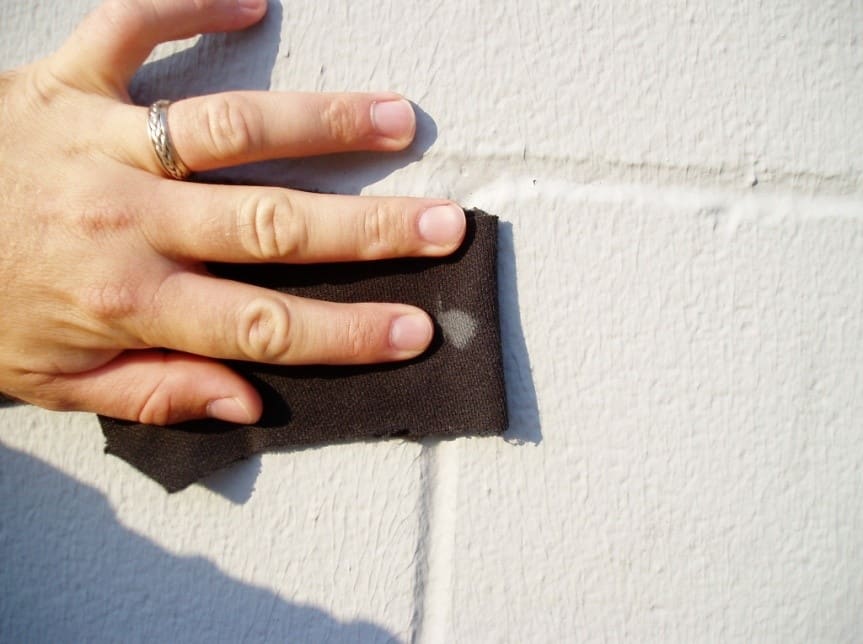
Before overcoating existing paint, specifications often require that the surfaces be free of chalk and that glossy coatings are de-glossed. ASTM D4214, Standard Test Methods for Evaluating the Degree of Chalking of Exterior Paint Films describes a simple field method for evaluating chalking by wiping a clean black fabric such as wool felt across the surface and visually comparing the appearance of the residue on the fabric with an ASTM rating scale (see Photo No. 7).
Determining compliance with de-glossing requirements is simply a visual inspection to determine if shiny areas remain. There are no standards to assist in this assessment.
The bottom line for the surface preparation inspections is to confirm that the correct methods of cleaning were used (pressure washing at 5,000 psi with a rotating tip, power tool cleaning, abrasive blast cleaning, etc.), that metallic surfaces meet the specified degree of cleaning and surface profile, that concrete substrates are free of loose interference material or curing compound, that any coatings that are permitted to remain are intact and well-adherent, the substrate is free of moisture, and that the surface is free of gloss, grease, oil, chalk, dust, and debris prior to coating.
Ambient Conditions for Painting
Once the surface is prepared, the coatings must be applied before the substrate deteriorates or becomes contaminated. The work must be scheduled so that the ambient conditions (surface and air temperatures, relative humidity, and surface temperature/dew point relationship) comply with the manufacturer’s requirements and the project specification.
Application characteristics, drying, and film formation are impacted if the air or surface temperatures are too hot or too cold, or the relative humidity is too high. A common problem with metal surfaces in direct summer sunlight is that the surface temperature can easily exceed 150°F, even though the ambient temperature is 90°F. This is too hot for proper coating application. Another concern with surface temperature is when it is not sufficiently above the dew point temperature (a minimum of 5°F greater than the dew point is the general rule). Under these conditions, condensation can form on the surface. Condensation and excessive humidity at the time of application can affect the performance of the coating as well as the aesthetics of the finish coat, leading to a dull, hazy, or mottled appearance.
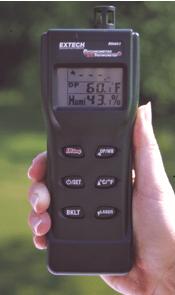
The ambient conditions should be measured where the work is being performed. For example, if the coping along the roof line is being painted, the conditions should be measured there, rather than on a door at the base of the building. The typical frequency of measurements is roughly every 4 hours unless the weather conditions are visibly changing, in which case the frequency should be increased. With the sophisticated electronic instruments available today (see Photo No.8), an entire set of readings at a given location can be taken in seconds.
Simple measurements of the ambient conditions prior to, during, and after application will help to assure that a complete, continuous, properly cured film can be achieved. A more detailed review of the measurement of ambient conditions, and manufacturer’s product data sheets can be found in the D+D September 2010 article, “The Weather Factor: Conditions Can Rain on Painting Parade.”
Coating Materials and Mixing
Many different coatings are frequently required for a given project, regardless of its size. In the case of metal substrates, one or more of the coats applied to steel, galvanize, and aluminum are likely to be different. Pre-cast and tilt-up often require the use of a different primer than CMU. The finish coats will vary due to differences in desired sheen, or because the long term stability of certain colors of a given product line may not be adequate. With different products being used on a structure, and different areas being painted at the same time, it is easy for materials to get mixed up, and the wrong products or wrong colors applied at a given location.
Care must also be taken to assure that the products are thoroughly mixed, and in the case of multiple component materials, that all components are blended together in the proper proportions. Certain multiple component materials also require a sweat in time after mixing before they can be applied, and must be used before to the expiration of the pot life.
Inspections of the products during application help to assure that the coatings are thoroughly mixed and that the correct materials and colors are being applied; a task that can be more involved than it seems.
Application – Coverage, Thickness, and Continuity
The application process should be observed for compliance with the specification requirements and manufacturer’s instructions, with particular attention paid to cleanliness between coats, drying time between coats, and achieving complete coverage, proper thickness, and film continuity (see Photo No. 9). When applying the coating by spray to CMU, immediately upon application, the wet paint is typically back-rolled to work the material into the porous surface. When spraying coating to scored block, the scores should be back-brushed to work the material into the interior surfaces and to remove drips. When painting back-to-back angles and crevices, the wet coating should be worked into the irregularities by brush to fully cover all surfaces. The specification may also require that an extra stripe coat be applied to irregular surfaces to achieve complete and thorough coverage.
Inspections should also be conducted to confirm that the correct number of coats is applied and that each of them meets the specified thickness requirements. A wet film thickness gage (see Photos No. 10 and No. 11) is a quick, inexpensive method for checking the thickness of the coating while it is being applied. The coating manufacturer’s literature will indicate the desired wet film thickness.
The end points of the gage are on the same plane and are pressed through the paint immediately upon application to make solid contact with the underlying surface. The teeth between the endpoints are labeled with the distance from the bottom of the tooth to the plane created by the endpoints. When the gage is removed from the surface, the wet film thickness is between the last wetted tooth and the next adjacent dry one. A reading can be taken in seconds. One caution is that the surface being measured has to be smooth in order to avoid irregular wetting of the teeth. For example, the gage cannot be used on split-faced block, but it could be used on the adjacent mortar joints.
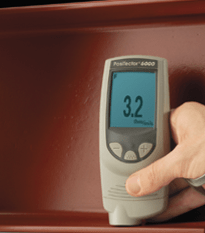
Once the paint dries, there are a number of instruments that can be used to accurately measure the thickness on metallic surfaces. Magnetic thickness gages are used on steel substrates, including galvanized steel (see Photo No. 12), with eddy current gages used on non-ferrous metals. Two standards are commonly used:
- SSPC-PA2, Measurement of Dry Coating Thickness with Magnetic Gages, provides detailed guidance on use of magnetic dry film thickness gages and frequency of measurements on steel substrates.
- ASTM D7091, Nondestructive Measurement of Dry Film Thickness of Nonmagnetic Coatings Applied to Ferrous Metals and Nonmagnetic, Nonconductive Coatings Applied to Non-Ferrous Metals, provides guidance for measuring thickness on all metallic substrates.
Verification of coating thickness on concrete is typically done during application using wet film thickness gages or in a global sense by calculating coverage rates, but an instrument is available that utilizes ultrasonic principles to measure the thickness of coating applied to concrete surfaces (see Photo No. 13). Use of the instrument is addressed in two different standards:
- SSPC-PA9, Measurement of Dry Coating Thickness on Cementitious Substrates Using Ultrasonic Gages
- ASTM D6132, Standard Test Method for Nondestructive Measurement of Dry Film Thickness of Applied Organic Coatings Using and Ultrasonic Gage

Destructive testing can also be used to confirm the thickness of coatings on metal and cementitious surfaces (see Photo No. 14). In this case, the coating is scribed with a special cutting tip and the scribe is viewed using a 50x microscope. These instruments are also useful for measuring the thickness of each coat in multi-coat systems, provided there is a contrast in color between them. Because the testing is destructive and can require some skill in interpretation, its use is typically confined to problem solving and forensic work. Use of the instruments is described in ASTM D4138, standard Test Method for Measurement of Dry Film Thickness of Protective Coating Systems by Destructive, Cross-Sectioning Means.

Inspections during application help to assure that the substrate and each coat are clean prior to application, that appropriate drying times are observed, that all surfaces, including irregularities, are properly coated, and that a wet film thickness gage is used to assure that enough paint, but not too much, is being applied. This is followed up with close visual inspections for complete coverage of irregular surfaces and continuity of the film across the entire surface. The finished film should be examined for runs, sags, drips, misses or skips, pinholes, thin and thick spots, shadow-through, dryspray, overspray, and erratic color or gloss. Dry film thickness measurements can also be taken as needed, both non-destructively and destructively, as the conditions warrant.
Conclusion
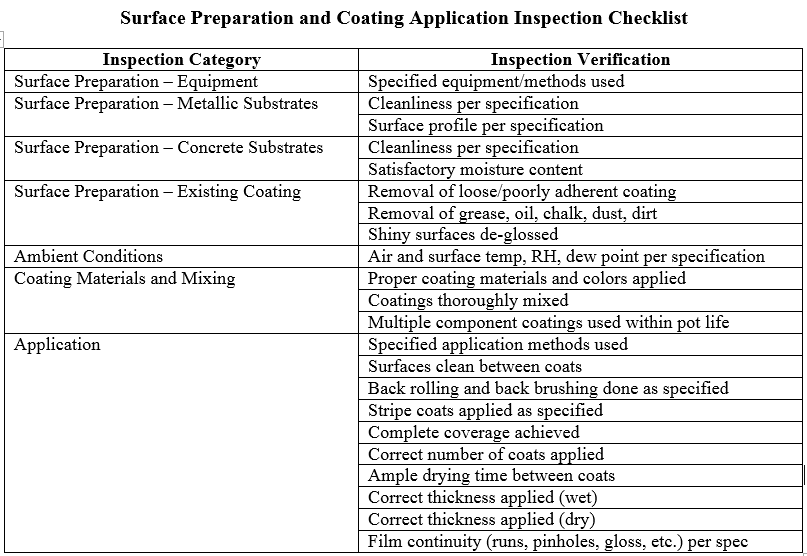
Oftentimes, the quality of the coatings work is only considered during a final walk-down inspection after the job is completed, and at that point the assessment is based on aesthetics. Unfortunately, there isn’t a direct relationship between a paint job that looks good during a final walk-down inspection and satisfactory long-term performance. When looking at the finished product, it is not possible to determine the quality of surface preparation, whether residual moisture was present in the walls at the time of application, if the coatings were thoroughly mixed, the correct coatings and proper thicknesses applied, or whether the ambient conditions were satisfactory at the time of application. These can only be determined through inspections while the work is in progress, or in the case of failures, through destructive field and laboratory testing after the fact. Even limited observations of the work while it is in progress, will prevent many of the problems that occur with the long-term performance of coatings on buildings.
The following checklist may provide some guidance on the basic inspections that should be performed to confirm the quality of cleaning and painting. The checklist can be tailored to the specific requirements of the project specification and the coating manufacturer’s requirements.
 ABOUT THE AUTHOR: Kenneth A. Trimber is the president of KTA-Tator Inc., Pittsburgh. Trimber has over 40 years of experience in the industrial painting field. He holds a bachelor’s degree from Indiana University of Pennsylvania, and is a NACE-Certified Coatings Inspector and SSPC Protective Coatings Specialist. Trimber is a past president of SSPC and a member of the Standards Review Committee, as well as the chairman of the SSPC’s Commercial Coatings Committee, Surface Preparation Committee and Containment Task Group. He is a past chairman of ASTM D1 on Paints and Related Coatings, Materials, and Applications, and authored “The Industrial Lead Paint Removal Handbook.”