The coating systems applied to the exterior of commercial buildings serve two functions – to protect and to beautify. Protection of substrates from deterioration and wind-driven rain requires the meticulous application of a continuous film to all surfaces. The coatings must be applied according to the manufacturer’s instructions and within defined thickness ranges. The application must also be attractive, as appearance and image go hand-in-hand. In order to achieve the desired protection and beautification, the coatings must be applied by skilled painters, using appropriate equipment and application techniques.
Since everyone has “painted” since they were children, the skill and equipment required to achieve a long lasting, aesthetically pleasing film are typically underappreciated. In reality, great skill, discipline, and specific equipment are required to apply a coating on thousands of square feet without visible defects such as brush and roller marks, overspray, lap patterns, shadow-through, dull spots, skips, misses, pinholes, runs and sags, and at a thickness that is not too heavy nor too thin. Only a few mils (1,000th of an inch) separate these two extremes. And the work has to be accomplished within a wide range of air and surface temperatures, a variety of humidity conditions, and in both still and breezy air.
The restrictions on ambient conditions must be met both during application and throughout the drying period. For more information on challenges related to weather conditions, see the D+D article entitled, “The Weather Factor: Conditions can Rain on Painting Parade,” published on the D+D website in September 2010.
The surface must also be properly prepared and the coating applied before surface degradation or contamination occurs. More information on methods of surface preparation for masonry surfaces can be found in the article, “Building a Formula for Removing Coatings from Masonry Surfaces,” published on the D+D website in November 2010 and in the March/April 2011 issue of the Durability + Design magazine.
Protective Coverings
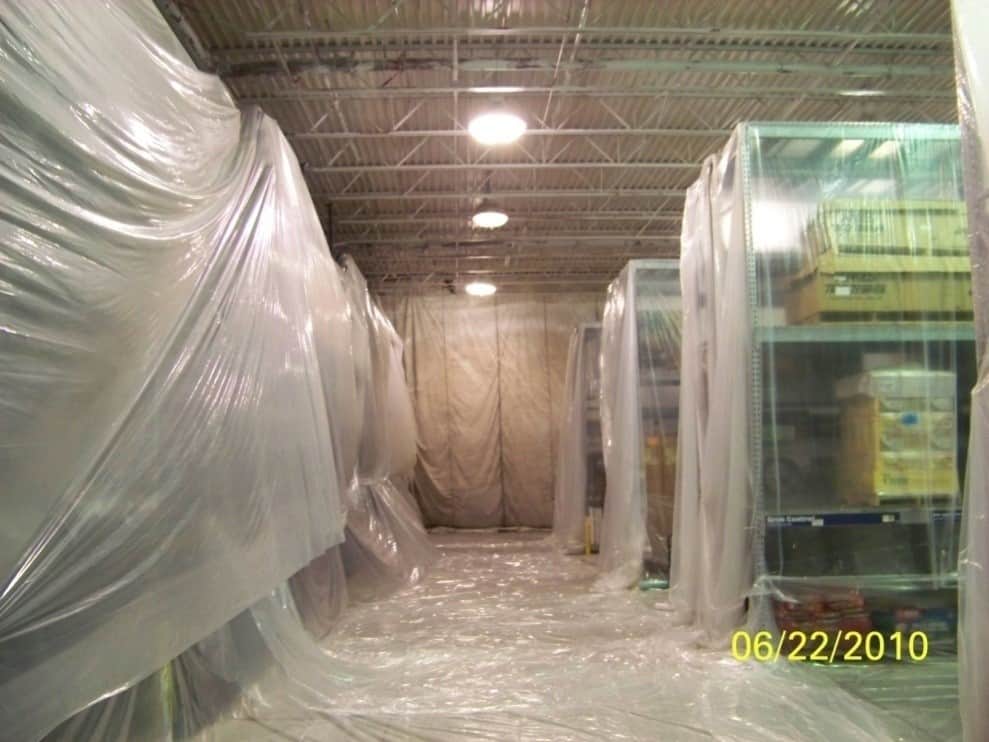
Before the work begins, surrounding surfaces must be protected from drips, spills, and overspray, which can involve masking, tarping, containment, removal of items such as signage, relocation of vehicles, and a myriad of other actions, (Photo No. 1).
Mixing
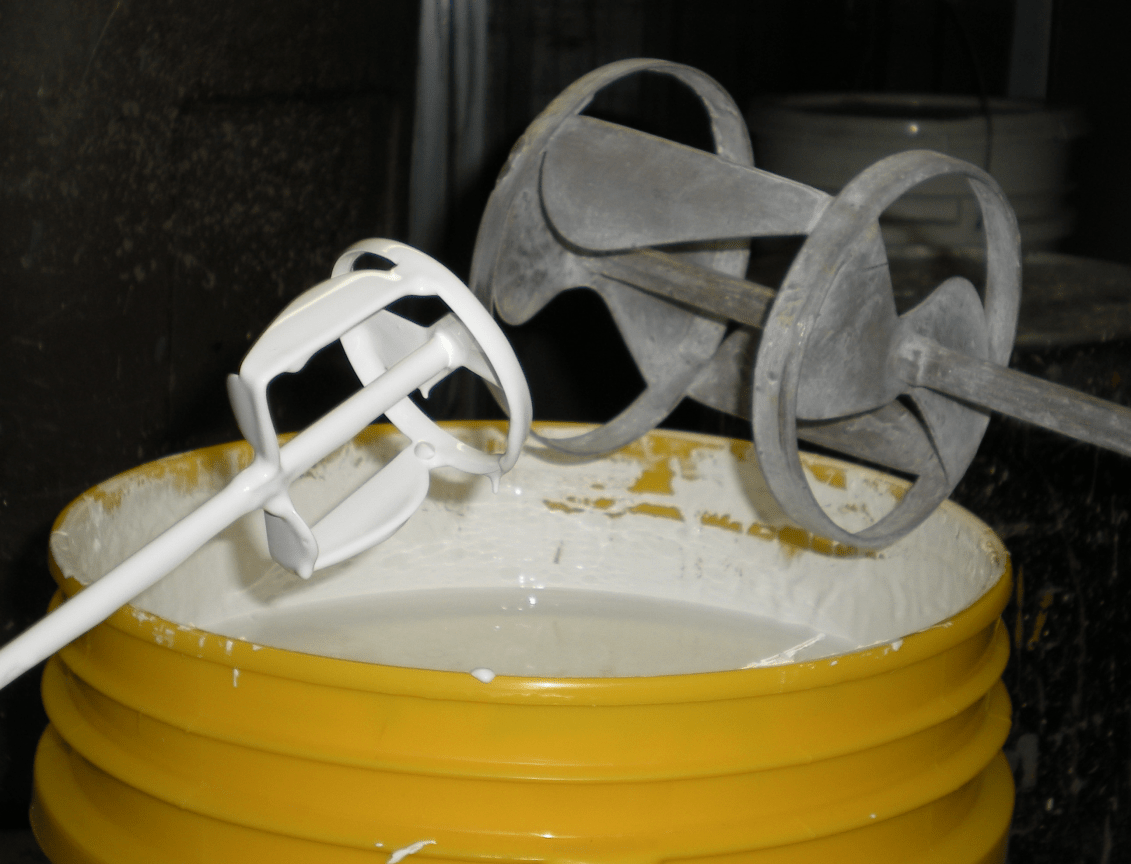
Controls over the quality of the applied coating begin before picking up a roller or pulling the trigger of the spray gun. It begins at the mixing stage. The goal of mixing is to thoroughly blend any settled material into the liquid until a uniform color is achieved, and in the case of catalyzed coatings to thoroughly blend the components together. For single component coatings (e.g., acrylic and alkyd), any skins on the surface of the coating must be removed and discarded before mixing begins. Mixing of small containers such as one gallon are typically done with hand stir sticks. Larger volumes are typically mixed using mechanical mixers that employ mixing blades (see Photo No. 2), or by boxing. If electric mixers are used, the motors must be explosion-proof.
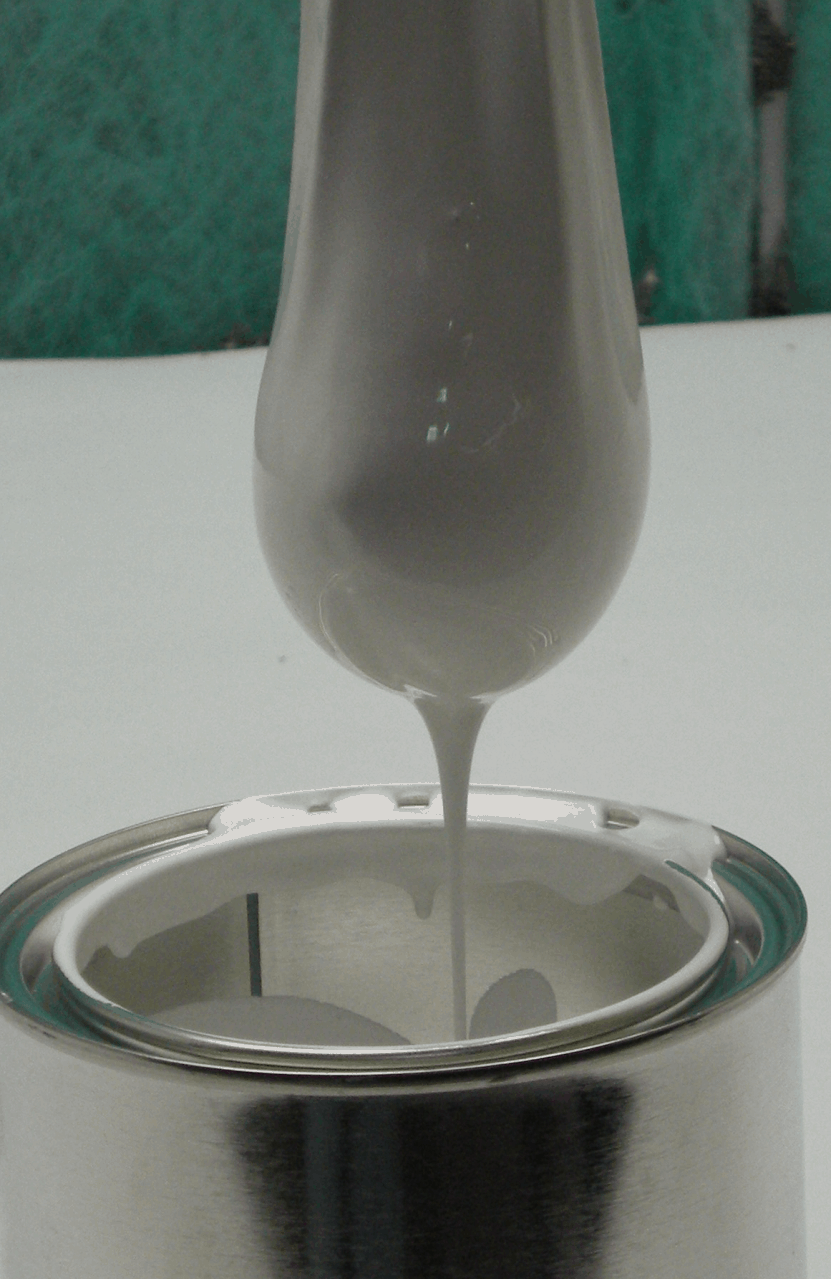
After mixing, if lumps from small remnants of skin or pigment agglomerations remain, they should be removed by straining. Commercial paint strainers and socks are available, but other methods of straining include the use of cheesecloth or fine mesh screen material (see Photo No. 3).
Another option for mixing is boxing. This involves pouring the coating back and forth between containers until a uniform consistency is achieved.
If possible, all of the material that will be used on a given wall, or on portions of a wall to logical breakpoints, should be blended together in order to avoid the possibility of slight variations in color that could occur between containers of material, especially if store or field tinting is being employed.
When multiple component materials are mixed (e.g., epoxy and 2 component urethane), the components need to be combined in proper proportions. This is best accomplished by mixing complete kits of material rather than breaking them down into partial kits. If partial kits must be mixed, the ratios should not be determined by eye, even when the ratio is 1 to 1. The individual components should be poured into marked containers so that the volumes are properly controlled. The remaining material must be tightly sealed to avoid solvent evaporation and product contamination. Once the components are added together, mixing must continue until the coating is a smooth, uniform consistency.
Thinner should be added only as needed to facilitate the application, and in the quantities approved by the manufacturer. For solvent borne coatings, the amount of thinner must also be carefully monitored to make certain that regulations for volatile organic compound (VOC) are not violated.
Brush Application
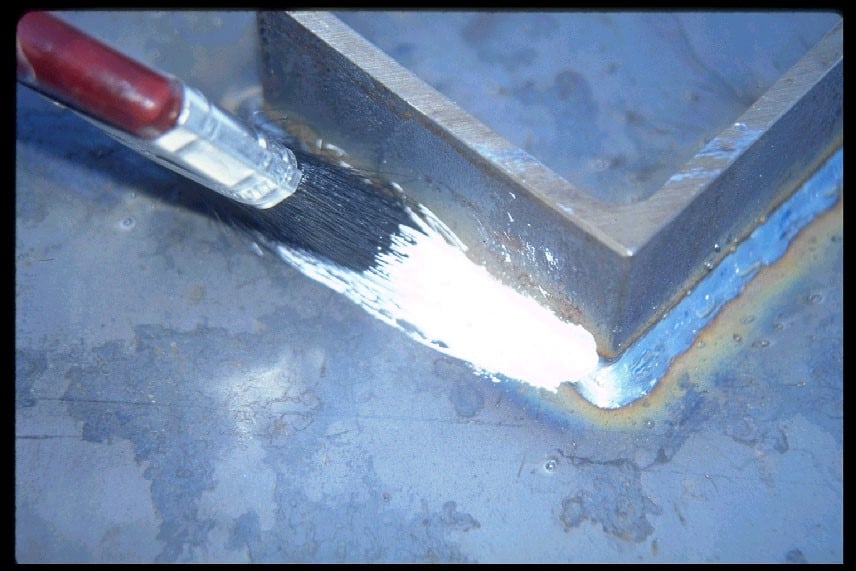
Brushes are used for painting small areas, touch-up, cutting the coating in at edges and inside corners (see Photo No. 4), and working the coating into crevices, irregular surfaces, and other limited access areas, such as the grooves of scored block
Brushes are available in different widths, bristle lengths, and configurations depending on the desired use. Wall brushes generally range from 3” to 6” in width. Bristles are either cut square to the handle or at an angle. Conventional handles are straight and shaped to fit the hand, but special designs are available with longer handles and the brush fixed at an angle (ferrule is bent) in order to reach areas of limited accessibility.
The bristles should be thick, plentiful and well-attached. When pulling gently on the bristles of a new brush, very few should be dislodged.
The bristles of the brush are either natural (e.g., hogs hair, also called China bristle) or synthetic (e.g., nylon, polyester, or a blend of both). The natural bristles can soften in water and swell, so they are typically used for oil and alkyd coatings. The synthetic bristles are not affected by water and are used for water borne coatings. Synthetic bristles are also available for use with essentially all coating types.
The bristles should be dipped halfway into the paint to avoid build up of paint in the heel of the brush. Excess coating should be removed by tapping the brush against the side of the container rather than dragging it across the rim. Dragging it across the rim can remove too much coating.
The coating should be first applied to the surface with a few light strokes, then spread uniformly and evenly using long, even, parallel strokes. The end of the stroke should be feathered by gradually pulling the bristles off the surface. Once the surface is coated, is should be finished off with light, quick strokes in the same direction to smooth and blend the brush and lap marks.
Roller Application
Rollers are used when coating large, flat surfaces, and rough surfaces such as concrete block. Cutting in of edges and corners with a brush is done in concert with the roller application in order to maintain a wet edge between the two applications.
Rollers can be generally categorized as dip rollers and pressure feed rollers. The dip roller is dipped into the paint in order to load it. For the pressure feed roller, the paint is pumped to the roller inside the frame and into the roller core, eliminating the need to continually dip the roller into the material.
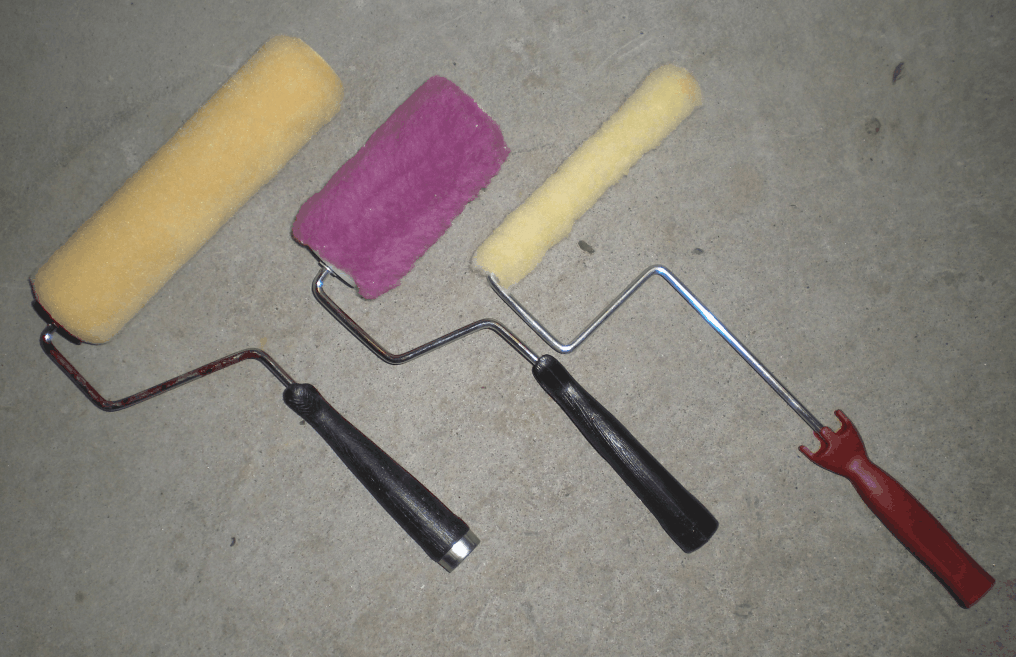
The roller core is typically a baked phenolic fiberboard. Inside diameters are typically 1 ½”, although smaller diameter rollers are available for use in areas of limited access. Roller widths range from 3” to 18”, with 9” being the most common (See Photo No. 5).
The fabrics of the roller covers, like the bristles of a brush, are available in both natural and synthetic fibers. Natural fibers include lamb’s wool, sheepskin, and mohair (goat hair). Synthetic fibers include polyester, acrylic, and nylon.
The length of the nap ranges from 1/8” to 1 ½”, classified as short (1/8”), medium (1/4” to ¾”), and long (1” to 1 ½”). The short nap is typically used for flat, very smooth surfaces. Medium nap is used on surfaces that are slightly rough. Within this category are 3/8” for smooth to very light texture; ½” for light texture; and ¾” for medium texture such as masonry. Long nap is used on rough textured surfaces where the coating must be worked into pits and irregularities such as brick and block.
Before using a new roller cover, it should be vigorously rubbed with the hands to remove all loose nap, otherwise the nap will deposited in the fresh paint, which can affect the integrity of the film (see Photo No. 6).
When using a tray, dip the roller in the coating, then roll it back and forth over the ramp to completely cover the roller with the coating. When using a five-gallon bucket and roller grid or screen, dip the roller in the bucket, then roll it over the grid or screen to assure that it is completely covered but not dripping with paint.
The coating is first applied in a zig-zag pattern like the letter M, cross-rolled to spread the paint across the surface, then finished with strokes at a right angle to the first. For example, if the first set of strokes to spread the material is made horizontally, the finish strokes should be made vertically. The ends of the strokes should be feathered by slowly pulling the roller away from the surface while still moving.
Spray Application
Specially designed spray guns are used to atomize the paint into fine droplets and propel the droplets to the surface. Once reaching the surface, the droplets must remain fluid for a long enough time to knit and flow together to form a continuous film. Special skill is required to achieve proper atomization and to control the gun-to-work piece distance and spray angle in order to consistently deposit a film of the desired continuity and thickness.
Spraying is the most productive and efficient means of applying the coating, but also creates the greatest potential for painting surrounding surfaces with overspray. All of the finely atomized droplets of paint do not reach the intended target and are carried by wind and gravity until they are stopped by other surfaces. Hopefully those other surfaces are drop cloths, tarpaulins, or containment materials, rather than vehicles, merchandise, sidewalks, or other parts of the building that are not intended to be painted.
There are two common types of spray application equipment – air spray, and airless spray. For air spray, also known as conventional spray, pressurized pots are used for production work; siphon guns can be used for small work. For the production work, the paint is poured into a sealed pot. The pot is pressurized to force the material through a fluid line to the spray gun. A separate hose attached to the gun carries clean, dry, compressed air (see Photo No. 7). The air converges with the fluid as it exits the nozzle, atomizing the paint stream into fine droplets. For most applications, the optimum distance between the spray gun and the surface is 6 to 8 inches.

For the siphon feed gun, the paint is poured into a small cup (typically 1 or 2 quarts in size) that is attached to the gun. A suction is created by the atomizing air supplied to the gun, drawing the paint from the cup into fluid tip where it is atomized.
Conventional spray creates more overspray than airless spray because compressed air blows across the paint stream to atomize it. It provides the painter with greater control of the spray pattern at the gun, ranging from a small circle to a large oval, and is used for more intricate work.
Airless spray uses a hydraulic pump to force the paint to the gun under high pressure. The paint is atomized as it exits the nozzle to atmospheric pressure, in the same manner that water atomizes as it leaves a garden hose. Only one hose, a paint hose, is attached to the gun (see Photo No. 8). The optimum gun-to-work piece distance is 12” to 14”.
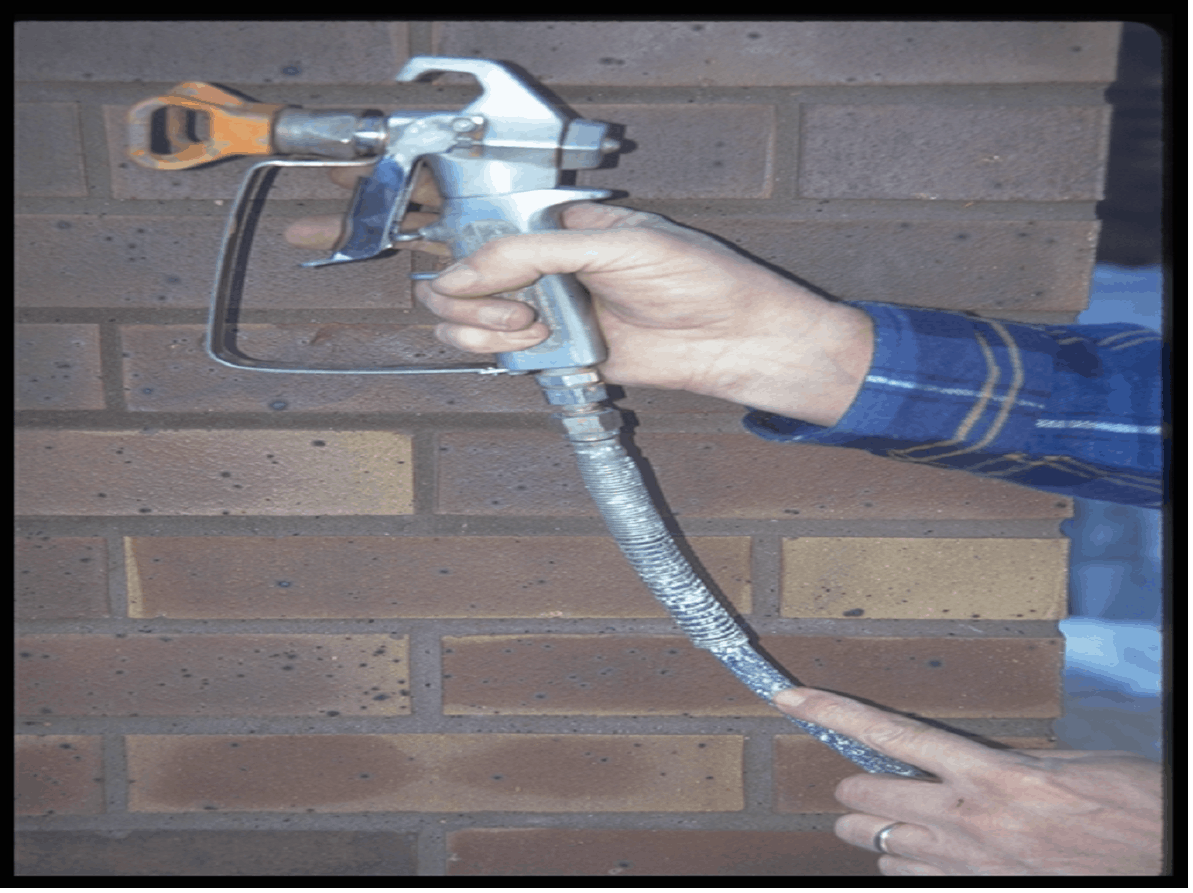
Airless spray provides the highest productivity as a great deal of material can be applied in a short period of time. The size of the spray pattern is controlled by the tip. Because of the volume of coating that passes through the gun every second, it must be under constant movement when the trigger is pulled to avoid the application of too heavy a film or runs and sags.
Back Rolling and Back Brushing
When applying coatings to CMU by spray, back rolling is required to work the paint into the irregularities of the textured surface to achieve complete coverage. In some cases, back rolling must be done a few times.
Back brushing is a similar concept and is used to work the material into surfaces such as the grooves of scored block. If the grooves are not back brushed, complete coverage of the interior faces will not be achieved, allowing water to collect on the horizontal surfaces and penetrate the block. Without back brushing, the applied paint can also bridge the grooves rather than penetrate into them. Extra effort will be required in the future to mechanically remove the bridged coating in order to make the interior faces accessible for proper application (see Photo No. 9).

More is not Better
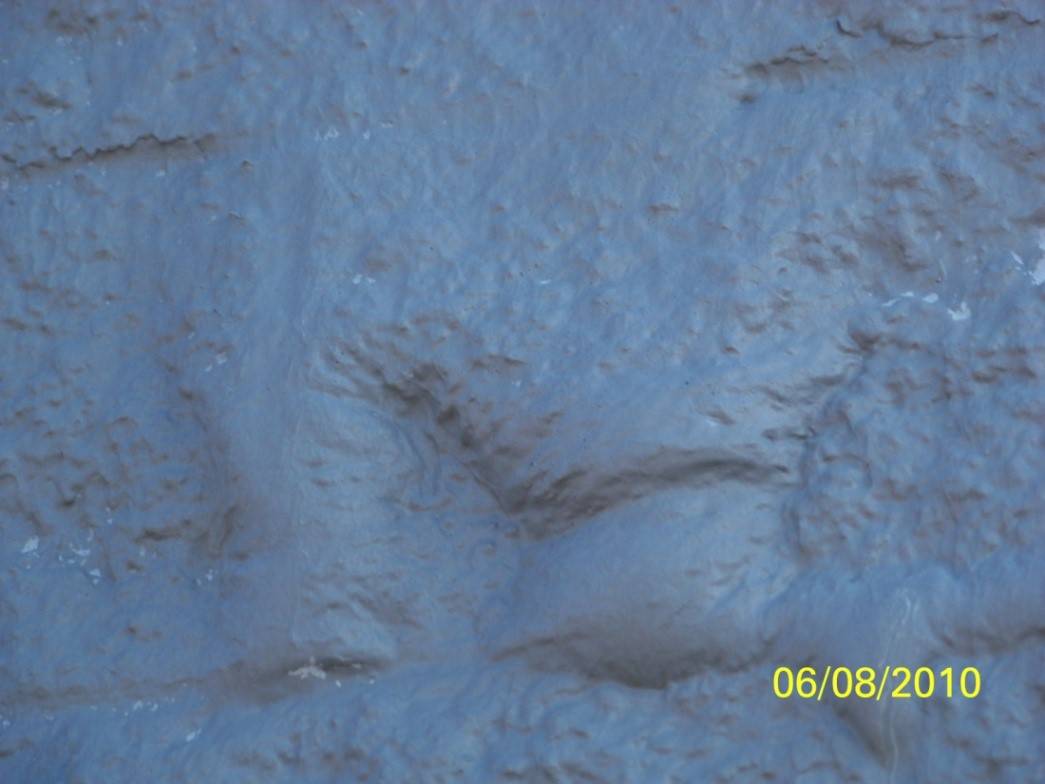
While it is important to minimize the number of pinholes in a film applied to CMU, care must be taken to not apply too much coating just to eliminate the pinholes. More is not better. The problem with the application of excessively heavy coating or multiple coats from repeated repainting is its effect on lowering the permeance of the system. If the permeance of the system becomes too low, moisture vapor from the interior of the building cannot escape through the film, which can lead to film defects (see Photo No. 10).
Conclusions
It is very challenging to apply a continuous, uniform coating of proper thickness to the exterior of commercial buildings. Painters have to deal with a variety of weather conditions; accessibility to the work; control of overspray and drips; painting many textures and configurations without skips, misses, runs, and sags; and assuring that the finished product is uniform in appearance, color, and gloss.
There are a number of application methods and types of equipment that can be used. While a tool is available to address most any need, the ultimate success of the project rests on the skill and care exercised by each individual painter.
 ABOUT THE AUTHOR: Kenneth A. Trimber is the president of KTA-Tator Inc., Pittsburgh. Trimber has over 40 years of experience in the industrial painting field. He holds a bachelor’s degree from Indiana University of Pennsylvania, and is a NACE-Certified Coatings Inspector and SSPC Protective Coatings Specialist. Trimber is a past president of SSPC and a member of the Standards Review Committee, as well as the chairman of the SSPC’s Commercial Coatings Committee, Surface Preparation Committee and Containment Task Group. He is a past chairman of ASTM D1 on Paints and Related Coatings, Materials, and Applications, and authored “The Industrial Lead Paint Removal Handbook.”