KTA’s Certified Coating Inspector Forum Issue No. 5 – September 2022
KTA’s Certified Coating Inspector Forum is designed to provide professional development/continuing education on standards, inspection practices, new instruments, and other topics to help keep certified AMPP and FROSIO coating inspectors current. It represents the views of the author and KTA-Tator, Inc. It may or may not represent the views of AMPP: The Association for Materials Protection & Performance, even though SSPC, NACE, and AMPP standards are frequently referenced in the content.
Introduction
Measuring the surface profile of steel and other metallic surfaces after abrasive blast cleaning or power tool cleaning is reasonably well understood among trained and certified coating inspectors. We are educated and tested on the proper use of visual comparators (Keane-Tator and ISO), depth micrometers, and replica tape as described in ASTM D44171. Some are also familiar with stylus instruments that generate peak count data, and optical grade replica tape that is used to generate peak density values. Most also know the content of SSPC-PA 172, which provides information on the frequency and acceptability of surface profile measurements on steel.
However, none of these standards can be referenced or used when measuring the surface profile of concrete surfaces. This article focuses on the standards and techniques for assessing the surface profile/roughness of concrete after various methods of preparation. It also describes a research initiative (published in the AMPP 2022 Conference Proceedings) that culminated in AMPP Technical Report 215403, which contains information on correlating qualitative surface profile assessment methods to quantitative methodology on prepared concrete substrates.
Qualitative Assessment of Concrete Surface Profile

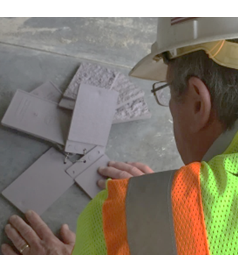
The surface profile (roughness) of prepared concrete can be assessed qualitatively (visually) using Concrete Surface Profile (CSP) Chips such as those described in Guideline No. 310.2R4, produced by the International Concrete Repair Institute (ICRI), or by creating a replica of the prepared surface using an epoxy putty as described in ASTM D76825, and comparing it to the specified ICRI chip. Creation of the replica is described below under “Quantitative Measurement of Concrete Surface Profile.”
The ICRI CSP Chips are approximately 16 square inches (3.5” x 4.5”), made from a gray, pliable rubber material, and are designed to replicate 10 surface profiles (see Table 1).
Table 1: ICRI CSP Chip Designation and Represented Surface Preparation
| ICRI CSP Code | Surface Preparation Represented |
|---|---|
| CSP 1 | Acid-etched |
| CSP 2 | Grinding |
| CSP 3 | Light Shotblast |
| CSP 4 | Light Scarification |
| CSP 5 | Medium Shotblast |
| CSP 6 | Medium Scarification |
| CSP 7 | Heavy Abrasive Blast |
| CSP 8 | Scabbled |
| CSP 9 | Heavy Scarification – rotomilled |
| CSP 10 | Handheld Concrete Breaker followed by Abrasive Blasting or High-Pressure Water Jetting |

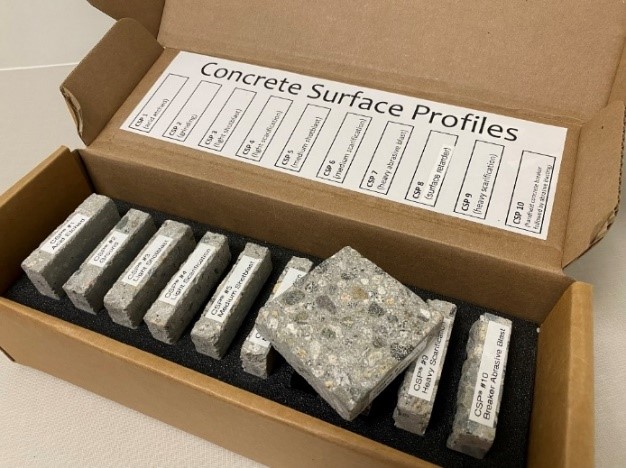
More recently, Technical Applications for Concrete Materials (TACM, a division of Artflor, Inc.) has made available concrete samples that are mechanically (or chemically) processed by the actual methods used to obtain the ICRI CSP® profiles.
The TACM samples are manufactured from 7000 psi compressive strength concrete and prepared to 10 different levels of surface roughness/texture that are similar to the ICRI CSP rubber chips6. Each sample is approximately 9 square inches (3” x 3”). The TACM concrete samples were available to the industry mid-year 2021; the surface preparation depicted by each is shown in Table 2.
Table 2: TACM CSP Chip Designation and Represented Surface Preparation
| TACM CSP Code | Surface Preparation Represented |
|---|---|
| CSP 1 | Acid-etched |
| CSP 2 | Grinding |
| CSP 3 | Light Shotblast |
| CSP 4 | Light Scarification |
| CSP 5 | Medium Shotblast |
| CSP 6 | Medium Scarification |
| CSP 7 | Heavy Abrasive Blast |
| CSP 8 | Surface Retarder |
| CSP 9 | Heavy Scarification |
| CSP 10 | Breaker, followed by Abrasive Blasting |
The CSP Chips produced by ICRI are arguably the most widely recognized and most frequently specified method to assess concrete roughness; however, this method (as well as the newer TACM concrete samples) is qualitative and requires some judgement. Fortunately, as an inspector all we are asked to do is verify whether the surface texture meets a given CSP Chip No., which helps minimize the subjectivity of the assessment. Further, unlike steel, we can use tactile methods (touch/feel) in addition to visual assessments on concrete without the concern of rust back.
Quantitative Measurement of Concrete Surface Profile
Quantitative methods of measuring surface profile of prepared concrete include a proprietary, two-component, non-stick epoxy putty specially designed to replicate concrete surface roughness (profile), and direct measurements of the prepared concrete using a depth micrometer.

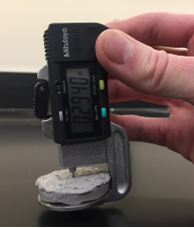
A proprietary, 2-component epoxy putty is used to create a 1.5-inch diameter impression, per ASTM D76827. This impression, once cured, is subsequently measured using a special micrometer equipped with a 1.5-inch diameter contact point (base) to support the epoxy putty replica. The micrometer is available from the putty supplier. Ten readings are obtained. The difference between the lowest and highest peak-valley measurements is reported. This procedure is described in ASTM D7682, Method B.
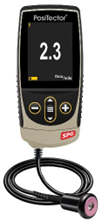
Direct measurements of surface profile can be obtained using a specialized depth micrometer as described in ASTM D82718. The depth of the surface profile is measured using a fine spring-loaded pointed probe. The base of the probe is 1” in diameter and rests on the top of the peaks of the concrete profile, while the spring-loaded tip projects into the valleys. A minimum of 15 readings are taken within a 6” x 6” area and the range and average profile reported after discarding outlier readings.

Determining the Frequency and Acceptability of Surface Profile Measurements
While ICRI, TACM, and ASTM describe procedures for assessing surface profile of concrete (qualitative or quantitative) and in the case of ASTM describe the number of readings to obtain per location, none of these methods prescribe the number of locations to assess. To fill this gap, AMPP SP215139 was published in 2021 and describes the number of locations that should be measured to characterize the entirety of the prepared surface using each of three methods (depth micrometer, ICRI CSP Chips, and replica putty), the procedure for determining conformance to the specified surface profile range, and a procedure for determining the magnitude of non-conforming surface profile. Note that if AMPP SP21513 is not specified, the number of locations to be assessed should be discussed and agreed upon before the work begins (e.g., at a pre-job meeting).
Correlating Qualitative Surface Profile Assessment Methods to Quantitative Methodology
As mentioned earlier, the CSP Chips produced by ICRI are arguably the most widely recognized and most frequently specified method to assess concrete roughness; however, this method (as well as the newer TACM concrete samples) is qualitative and requires some judgement. The procedures described in ASTM D7682 (Method B) and ASTM D8271 are quantitative but are not widely specified. AMPP recognized the value in collecting data to correlate the qualitative and quantitative methods of assessing the surface profile of prepared concrete so that specifiers can specify either, without inadvertently invoking contradictory requirements. To accomplish this, a study was conducted in 2021 using rigid, epoxy-cast replicas of seven of the ten ICRI CSP Chips (CSP 1-7), seven of the ten concrete samples (CSP 1-7) manufactured by TACM, and the two methods utilizing depth micrometers (ASTM D7682 Method B and ASTM D8271).
The data produced in the study culminated in a Look-up Table (shown below) that enables a specifier to easily convert a qualitative assessment (e.g., ICRI or TACM CSP 1-7) to a quantitative range for surface profile on concrete. Ranges are only shown for CSP 1-7 since only those were studied during the research and the values are rounded. Tolerances were established based on the standard deviation data.
Look-up Table (Conversion of ICRI and TACM Panels to mils)
| Description | ICRI CSP No. | ASTM D8271 (mils)* | TACM CSP No. | ASTM D8271 (mils)* |
|---|---|---|---|---|
| Acid-etched | 1 | 6 ± 2 | 1 | 2 ± 0.5 |
| Grinding | 2 | 6 ± 2 | 2 | 3 ± 0.5 |
| Light Shotblast | 3 | 11 ± 2 | 3 | 12 ± 2 |
| Light Scarification | 4 | 15 ± 2 | 4 | 30 ± 3 |
| Medium Shotblast | 5 | 16 ± 2 | 5 | 29 ± 3 |
| Medium Scarification | 6 | 37 ± 4 | 6 | 28 ± 3 |
| Heavy Abrasive Blast | 7 | 48 ± 4 | 7 | 38 ± 3 |
| Scabbled/ Surface Retarder | 8 | Not measured | 8 | Not measured |
| Heavy Scarification – | 9 | Not measured | 9 | Not measured |
| Handheld Concrete Breaker followed by Abrasive Blastingor High-Pressure Water Jetting | 10 | Not measured | 10 | Not measured |
The outcomes of the research (published by AMPP in the 2022 Conference Proceedings) were so compelling (along with the perceived value of the data to the concrete coating industry) that AMPP published a Technical Report in 2022: TR21540, Correlating Qualitative Surface Profile Assessment Methods to Quantitative Methodology on Prepared Concrete Substrates.

Summary
This article focused on the standards and techniques for assessing the surface profile/roughness of concrete after various methods of preparation. It also described a research initiative that ultimately produced an AMPP Technical Report containing information on correlating qualitative surface profile assessment methods to quantitative methodology on prepared concrete substrates. As trained/certified coating inspectors we are expected to understand the inspection requirements of many substrates, not just steel. Concrete surfaces are occasionally coated, and preparation of the concrete prior to sealer or coating application is key to long-term performance, so inspection of roughness and cleanliness is frequently required. Understanding the various qualitative and quantitative methods of concrete profile measurement is a valuable attribute for a trained or certified coating inspector.
1 Standard Test Methods for Field Measurement of Surface Profile of Blast Cleaned Steel, ASTM International
2 Procedure for Determining Conformance to Steel Profile/Surface Roughness/Peak Count Requirements, AMPP
3 Correlating Qualitative Surface Profile Assessment Methods to Quantitative Methodology on Prepared Concrete Substrates, AMPP
4 Selecting and Specifying Concrete Surface Preparation for Sealers, Coatings, Polymer Overlays, and Concrete Repair, ICRI
5 Standard Test Method for Replication and Measurement of Concrete Surface Profiles Using Replica Putty, ASTM International
6 Concrete samples produced in accordance with ICRI 310.2R Guideline, under an agreement with ICRI
7 Standard Test Method for Replication and Measurement of Concrete Surface Profiles Using Replica Putty, ASTM International
8 Standard Test Method for the Direct Measurement of Surface Profile of Prepared Concrete, ASTM International
9 Procedure for Determining Conformance to Concrete Surface Profile Requirements, AMPP


Great article, I see I’m a little late to the party as this was published a couple years ago but it is still really informative and interesting. I work as a construction inspector and frequently am called in to assess existing and/or prepared concrete surfaces for coatings applications in the wastewater field. Thanks for the article and I guess I’ll be checking out others from here.
Hi Larry, we appreciate the comment – thank you for reading! If you would like to keep up to date with new KTA University publications, you can subscribe to our email list at https://kta.com/kta-university/