Most of the past Cases from the F-Files have focused primarily (although not exclusively) on coating failures on steel. However, coating failures can and do occur on other substrates such as aluminum, wood, and concrete, to name a few. In this case, a warehouse concrete floor coating was exhibiting blistering only a few months after installation.
A large existing warehouse building was being modified to house a light manufacturing facility. The floor was constructed of concrete slabs. It was reported that there was no moisture barrier underneath the slabs.
The floor coating project included removal of an original clear coating by portable centrifugal blast cleaning. The new system consisted of four coats that included an epoxy penetrating primer, an aggregate-filled epoxy base coat, an epoxy grout coat, and an epoxy finish coat. It was reported that moisture vapor transmission (MVT) testing was performed by the contractor prior to the new coating installation. The testing indicated a low MVT of less than 2 lbs./1,000 square feet/24 hours. Blisters began to appear in the coating within a few months of the floor coating installation (Fig.1). In this case, aggregate in a concrete floor, in the presence of moisture, caused blistering of the coating system. It is a relatively uncommon problem that could have easily been blamed on the contractor as mis-application of the coating, void of a thorough scientific analysis of the problem (in the field and laboratory) as well as knowledge of concrete substrates. Let’s take a closer look.

Field Investigation
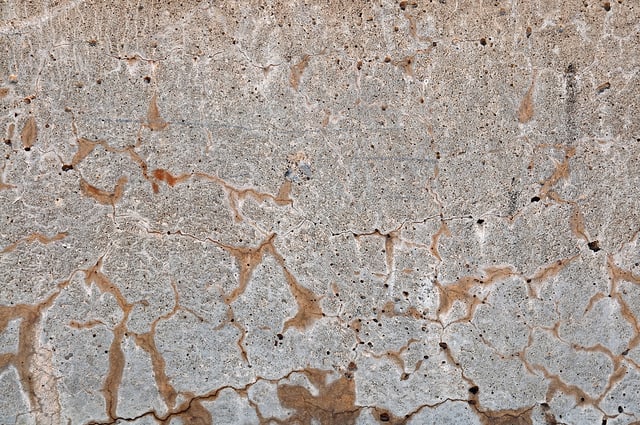
A visual examination revealed that blisters were present in all areas of the floor and were present in two conditions—areas with blisters that were still sealed (intact), and areas where the blister caps were ruptured. An amber material was found on the surface where the blister caps had ruptured. The concentration (density) of the blisters varied from location to location.
The intact blisters varied in size, having diameters that ranged from ½” to 2”. When evaluated in accordance with ASTM D714, the blisters were categorized as blister size No. 2 with a frequency between few and medium. When intact blister caps were removed, standing water was observed on the underlying surface (Fig. 2)

In most cases, the backs of the blister caps had a piece of what appeared to be aggregate attached to it. There was a depression in the floor at the location that corresponded to the aggregate on the back of the blister cap, as shown in Fig. 3.The plane of separation within the blisters appeared to occur between a gray cementitious coating layer and an opaque layer of material that covered a coarse profile in the surface of the concrete.

Adhesion was generally poor in most areas where sound blisters were present that were tested. The coating could be easily removed with a knife or chisel. Again, an opaque material was found on the surface of the concrete (Fig. 4).

Adhesion was also poor in areas where blisters were already ruptured. The amber-colored material associated with the broken blisters appeared to have been wiped away from some areas, leaving staining. Other areas of broken blisters revealed deposits of the sticky amber material on the coating surface (Figs. 5a and 5b).

Cracks were visible when the amber material was removed and the surface of the coating at the bottom of the blisters was examined under magnification (Fig. 6).

When the intact blister caps were removed, again the underlying surface was wet, and an opaque layer was observed on the surface of the concrete. In some cases, there was a soft white liquid under the blister cap. Examples are provided in Fig. 7 and Fig. 8.


Laboratory Investigation
Microscopic examination revealed that there was no primer coat attached to the back of the blister caps. The blister caps consisted of two layers—an aggregate-filled gray bottom coat ranging between 38 mils and 93 mils in thickness, and a light gray topcoat ranging between 2 mils and 11 mils in thickness.
Chemical analysis (Fourier transform infrared spectroscopy) of the coating layers determined that each was consistent in formulation with the specified epoxy coatings. Chemical analysis of the blister fluid identified it to be a silicate with hydrogen bonding (likely due to bound water). Similarly, the white deposits observed on the surface of the concrete contained silicates.
Chemical analysis of the amber deposit determined it to be consistent with carboxylate ions.
The latter two findings shed some significant insight into the cause of the problem. The first useful finding was determining that the opaque material present on the surface of the concrete and the blister fluid both contained silicates. The presence of silicates on the concrete surface underneath the blisters is a strong indication that an alkali-silicate reaction was occurring in the concrete. The field observation that aggregate was attached to the back of the blister cap supported this analysis. The aggregate pieces on the blister cap corresponded to depressions in the concrete.
The aggregate (chert/chalcedony, in this case) reacts with the alkalinity in the concrete in the presence of moisture to create a silicate gel. The silicate gel forms at a location where there is no space for it to form (between the concrete and the coating) increasing internal pressure. Blistering and poor coating adhesion occur as the gel pushes the coating off of the substrate to make space.
Associated with this reaction is spalling of the reactive aggregate. While there were strong indications that the aggregate had spalled underneath the blisters, petrography was required in order to confirm the presence of alkali-silica reactions (ASR) in the concrete (Fig. 9). As such, several concrete cores with intact blisters were removed from the slab for petrographic analysis.

As indicated above, the ASR reaction requires moisture. Despite the fact that many MVT tests were reportedly performed across the floor of the facility (all resulting in acceptable levels), there was a significant amount of water found beneath the coating—more than enough to cause the reaction. Another laboratory finding indicated that the amber-colored liquid was composed of carboxylates. When carboxylates are found on coating systems, there is a strong indication that moisture was present in the slab when the coating was applied. This infers that either the MVT tests were performed incorrectly, or the water table changed between the time that the testing was performed and the coating was applied.The petrographic analysis determined that the coating was delaminating at locations where white alkali-silica gel deposits were observed on the bottom surface of the coating system and on the top surface of concrete. The gel deposits could be traced to cracks radiating from chert/chalcedony coarse aggregate particles near the top surface of the concrete. Confirmation was obtained that ASR was present in the slab.
One final important finding indicated by the petrographic analysis was that evidence of ASR was observed only in the top 0.3 inches of the concrete. The body of the concrete did not exhibit distress, and the amount of reactive aggregate included in the concrete did not exceed the amount permitted by industry standards.
As a result, remediation of the floor coating would first include removal of the coating and the top 0.3 inches of concrete. Once the top layer was removed, it was recommended to allow the slab to dry out for approximately two weeks before another set of MVT tests was performed.
If the MVT tests exceeded acceptable levels for coating, then application of a moisture barrier was recommended to seal the concrete. Once the moisture barrier cured, it was recommended that the concrete be retested to verify that the MVT rate had been reduced to below acceptable levels. If the MVT rates were satisfactory, the originally specified coating system could be reapplied.
As seen in JPCL Magazine