Introduction – While cast iron and ductile iron can be used unpainted in some environments, there are many occasions, such as piping, when it is painted. For the coatings to adhere and provide the desired service life, the quality of surface preparation and coating application must be assured. This can be accomplished by thoroughly inspecting each phase of the work. While the general types of inspections performed mimic those conducted for cleaning and painting steel, there are also some differences.
Inspection Steps
Grease and Oil Removal – Like preparation of most substrates, inspection for the presence of grease, oil, or other deleterious contaminants that may interfere with the bonding of the coatings should occur prior to initiating any type of surface preparation. Removal methods include detergents, solvents, and various degreasers. The inspection is performed both visually, sometimes aided by black lights, and by a water bead test whereby droplets of water are dripped onto the surface and observed for beading. If the water beads, it is an indication that grease or oil contamination may be present.
Jobsite Mock-Ups – Before proceeding with the surface preparation, the desired surface preparation acceptance criteria should be agreed upon. This is best accomplished through preparation of a mock-up area on the surfaces to be prepared. The mock up should address the level of effort to achieve the desired cleaning, the resulting visual appearance (removal of all visible oil, grease, dirt, dust; annealing oxides if so specified; existing coatings; and other foreign matter), the surface roughness, or profile, and a discussion of hard to clean and coat areas. Photographs should be taken for future reference. A clear sealant could also be applied to preserve the appearance during the project, but note that the sealant will impart an unnatural glossiness to the surface and it will eventually have to be removed and the mock-up area coated with the rest of the structure.
Protection of Surrounding Surfaces – Another inspection consideration is verifying that surfaces not to be cleaned and painted are suitably protected, especially when abrasive blast cleaning is the selected surface preparation method. This can be especially important when sensitive rotating equipment or instrumentation is present, or specialty metals such as stainless steel and galvanizing are nearby.
Ambient Conditions – Ambient conditions should be monitored much the way they are during preparation and application to ferrous metals, typically with a maximum relative humidity of 85% and a dew point spread of at least 5°F s between the surface and dew point temperatures (the surface temperature being at least 5°F higher than the surface). Ambient conditions should also be monitored during application and curing as prescribed by the coating manufacturer.
Compressed Air Cleanliness – The compressed air supply should be confirmed to be clean by performing the blotter test which involves placing white blotter paper in the compressed air stream for approximately one minute and examining the blotter for moisture or oil contamination.
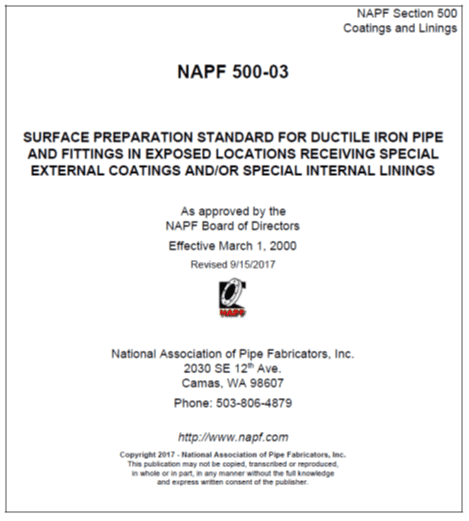
Surface Cleanliness – The surfaces prepared for coating should be visually inspected to verify compliance with specification requirements. It should be noted that the National Association of Pipe Fabricators (NAPF) has developed a series of surface preparation standards for ductile cast iron that are slightly different than those published by the Society of Protective Coatings (SSPC). NAPF 500-03, “Surface Preparation Standard for Ductile Iron Pipe and Fittings in Exposed Locations Receiving Special External Coatings and/or Special Internal Linings” addresses solvent cleaning, hand tool cleaning, power tool cleaning, and abrasive blast cleaning.

According to the NAPF, the inherent metallurgical and manufacturing differences for ductile cast iron preclude using the preparation standards developed for steel surfaces. One of the primary differences between cast iron and steel is that cast iron may have a layer of annealing oxide rather than mill scale. The annealing oxide adheres to cast iron better than mill scale adheres to steel, making it difficult to remove. But more importantly, an intact annealing oxide layer is a corrosion resistant and protective layer that is allowed to remain for most of the NAPF surface preparation standards. The appearance of ductile cast iron after preparation is also different than the appearance of carbon steel, so the visual guides available for steel surfaces are not representative of the appearance of ductile cast iron, making the creation of the mock up described earlier even more important. More information on surface preparation of ductile/cast iron can be found in Topic 1 of this series.
It is also important to have sufficient lighting to assess cleanliness, as well as an inspection mirror for inspecting difficult configurations.

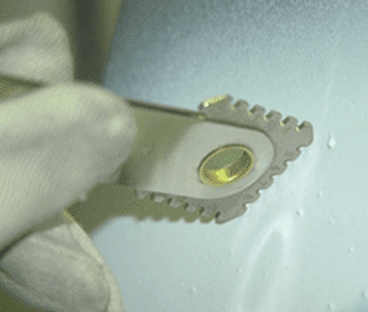
Surface Profile – The surface profile, if specified, can be measured in a variety of methods, most commonly using replica tape and a spring micrometer. Not unusual for cast iron and ductile iron surfaces is a very rough, deep, and at times varying surface roughness depending on where the profile is measured. This is due to the inherent roughness of the substrate itself in addition to the roughness imparted by power tools or the abrasive used for blast cleaning. On some occasions the inherent roughness may cause the profile depth the exceed the measurement range of the profile tape resulting in measurements that state “the profile is at least XX mils deep.” In these cases, it should also be noted that the depth is influenced by the substrate roughness rather than the media used for cleaning.

Coating Mixing – The mixing of coatings is often overlooked as being a critical step in the coating process. Many coatings involve differing quantities of components, require agitation prior to combining, have different thinning solvents based on ambient conditions, and may even require a digestion period prior to use. These coatings also generally have a useable period for application, or potlife. If exceeded, the integrity of the applied coating and the final cleaning of equipment can be compromised. If plural component equipment is employed, monitoring of component temperatures and mix ratios is very important.
Coating Application – Evidence of problems can occur with any application type and can be identified by observing the initial application. Improper spray patterns, sagging, or spitting of coating material can be observed and even heard by carefully listening for erratic sounds during application.
Wet Film Thickness – The wet film thickness should be monitored on a prescribed basis. This is often based on surface area or surface geometry. In-process wet film thickness monitoring performed accurately and regularly can avoid costly rework and delays to correct insufficient or excessive dry film thickness.

Dry Film Thickness – Measurement of the coating dry film thickness should be specified in the contract documents, as it can often be a source of disagreement. The frequency, allowable range of spot measurements, and overall interpretation of results are important to understand before beginning measurements. SSPC PA2, “Procedure for Determining Conformance to Dry Coating Thickness Requirements” provides the methods for measuring the coatings, as well as options for determining what is acceptable. Measuring cast iron surfaces may result in erratic readings due to the roughness of the substrate, so it is best to use good judgement and look for trends, i.e. discarding stray high or low readings. In order to mitigate the effect of the rough substrate on thickness readings, one specification required that carbon steel companion panels be prepared, coated by the same applicator with the same equipment at the same time as the production work, and measured for coating thickness as an additional quality conformation step.

Coating Coverage and Defects – As the dry film thickness measurements are occurring, a visual inspection for appearance should occur. Defects that that are detrimental should be identified, such as light areas, overly thick areas with sags or runs, pinholes, blisters or other defects identified in the specification. Following repairs, only the areas repaired should be visually reinspected, and coating thickness confirmed if appropriate. Repeating the visual inspection elsewhere should not be performed.
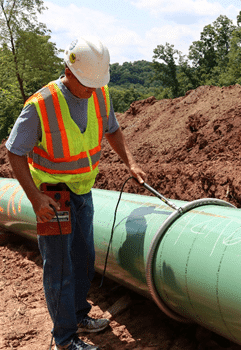
Holiday Detection – In some cases, such as services underground, the coated items may be specified to be holiday tested. The coating manufacturer’s product literature or technical specialist should be contacted for guidance prior to proceeding. If the coating is thicker, high voltage test equipment should be utilized, set at the correct voltage, and tested at a speed of approximately one foot per second. Holidays, or voids in the coating may be difficult to isolate, but repeated testing is cautioned. Following repair, only the repaired areas should be retested to confirm sealing of the void.


Conclusion – When cast iron and ductile iron are painted, it is important that the cleaning and application be carefully monitored to assure that the prepared surface is sound, and the coatings achieve proper adhesion. As noted, many of the same steps in inspecting other substrates can utilized with the understanding differences in measurements and surface cleanliness will occur. Developing an Inspection Plan, securing answers to uncertain requirements, and actively communicating during the execution of the project will lead to better results and ideally a project completed on schedule.
Written by KTA’s Bruce Rutherford (pictured)
