An American tobacco company owned a number of large buildings, essentially steel-framed warehouses covered with corrugated galvanized steel panels, at one of its facilities. The company used the warehouse buildings for the fumigation of the tobacco, during which the entire interior of the building is filled with a gaseous insecticide that kills tobacco-damaging insects.
Unfortunately, the joints of the steel panels were not completely sealed, allowing fumigation chemicals to escape. Therefore, the tobacco company chose to completely seal the building using a polyurea coating system.
Because this coating process was somewhat experimental, only one of the buildings was initially chosen for the application. If the coating application on the first building succeeded, then the additional buildings would also be coated.

The system chosen for application consisted a one-coat epoxy primer, followed by a coat of the polyurea product and a polyurethane topcoat. The 100% solids polyurea material, a two-component coating with a one-to-one mix ratio and a dry-to-touch time of 45 seconds, was reportedly designed to bridge cracks up to 1/8-inch wide. Application required using plural component equipment to apply the coating to a thickness of between 30 mils and 250 mils, in accordance with the product data sheet.
A review of the material’s product data sheet found no recommendations for preparation or application to previously-painted galvanized steel surfaces. (The previous coating system was not identified.) The product data sheet did, however, call for a deep angular profile for steel surfaces. It also specified that if the surface is to be primed, that the primer should not completely fill the profile. In this case, the previously-painted galvanized steel was prepared using pressurized water to remove any loose coating. The product data sheet also recommended that if the 16-hour recoat time was exceeded between coats of the polyurea material, that the surface should be sanded before application of an additional coat.
Several problems arose during the coating application to the exterior of the fumigation building. The coating system faced adhesion problems, and in some cases blistered and delaminated. As a result, some of the areas were repaired by removing the loose coating and reapplying the polyurea coating. In some areas, several attempts were made to repair the coating. For instance, two of the walls required four repair attempts each. In other cases, an epoxy primer was applied to the polyurea before applications of subsequent polyurea coats in an attempt to attain better adhesion. The manufacturer’s representative was present during much of the application.

Faced with the mounting costs of the repair and the uncertainty of the future performance of the coating system, the tobacco company decided to employ an independent coatings consultant to investigate the coating problems.
Field Investigation
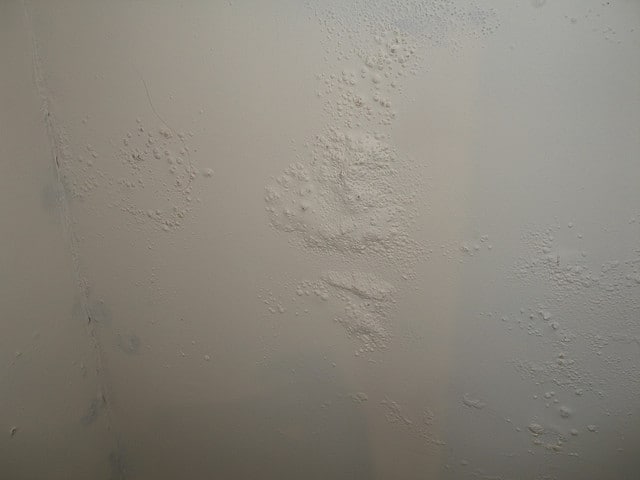
A site visit was scheduled to examine the walls of the subject fumigation building, along with the entire roof. The building was covered with a medium gray coating, which exhibited blistering and delamination in several areas. The blisters were relatively large—some over 1.5 feet wide and 5 feet long—and in many cases, the tops of the blisters were close to a seam in the corrugated galvanized steel building’s skin, while in other cases, the blister was in the middle of a panel away from any seam. The blisters also contained a considerable amount of water inside. The large blisters appeared in a teardrop pattern while in other areas the length (measured vertically) of the blisters was much greater than the width (measured horizontally).
In addition to the blistering, the polyurea coating displayed a sizable amount of cracking. Most of the cracks appeared on or around the runs, sags, or other accumulations of coating material.
Some cracking also occurred where the coating appeared to be extremely thin.
The coating was delaminated in many areas, and pulling at the edge of the delaminated coating caused the delamination to continue, sometimes for several feet. The plane of delamination varied from location to location. In some areas, especially on the roof, the coating could be easily removed from the epoxy primer. The coating appeared to separate cleanly from the primer, leaving only small islands of gray coating material on the yellow epoxy primer.
In other cases, one thick layer of gray coating material could be removed from another layer of gray coating material. Furthermore, in other areas, a relatively thick layer of coating material was found to be delaminating from a thin amber resinous layer that was on top of another gray coating material. In each of the cases when the coating delaminated, the surface uncovered by the delaminated coating was smooth and exhibited no signs of sanding or other roughening.
A polyurethane topcoat appeared to adhere satisfactorily to the thick polyurea coat, but the polyurethane topcoat, when viewed microscopically, was found to have cracked significantly.
The application of the polyurea coating was extremely uneven, with numerous runs and sags and, as noted above, there were often large cracks in the topcoat along the runs and sags. In general, the polyurea coating was consistently flexible and appeared to have good tensile strength.
Coating samples from the walls and the roof were removed for laboratory analysis, consisting of visual and microscopic examination and infrared spectroscopic analysis.
Laboratory Investigation
Visual and microscopic examinations of the paint chip samples were conducted. The examinations disclosed that the coating system consisted of a bluish-gray brittle top-coat with underlying flexible gray coats and an intermittent yellow translucent brittle coating. Often, there were multiple coats where the yellow primer was present between thick layers of gray coating. The total thickness of the coating samples range from as low as 10 mils to as high as 105 mils. The surface of the coating in the plane of delamination was relatively free of significant visible contamination and showed no indication of sanding or other mechanical abrasion.
Infrared spectroscopic analysis was performed, confirming that the coatings applied to the fumigation building were, in fact, the generic coatings that were specified for the project. The topcoat had a spectrum consistent with a polyol-cured polyurethane, the intermediate coat had a spectrum consistent with a polyurea, and the primer had a spectrum consistent with an epoxy. Analysis of the coating surface at the plane of the delamination failed to detect the presence of hydrocarbons or other contaminants that would contribute to poor adhesion and delamination.
Discussion
The field investigation and the laboratory analysis revealed that the cause of the polyurea coating’s delamination and blistering was inherent poor adhesion of the coating to both the primer and, when applied in multiple coats, to itself. The poor adhesion allowed water to migrate between coatings and accumulate in areas, creating the large blisters.
An epoxy primer from the manufacturer of the polyurea coating was used. The product data sheet for the primer recommended that metal surfaces be abrasive blast-cleaned to produce a deep angular profile, and that the epoxy primer be applied thin enough so that it did not cover the entire profile. A reasonable assumption could be that the remaining profile was necessary to ensure good adhesion of the polyurea to the epoxy primer.

The system designed for application to the fumigation building utilized a surface preparation method that provided no surface profile. As a result, there was no profile to increase the adhesion of the polyurea to the epoxy primer. In numerous areas, the polyurea delaminated from the epoxy primer, oftentimes resulting in large blisters. Even where the coating system exhibited no sign of blistering, the polyurea was usually only loosely attached to the primer, and could be removed with ease.
In most of the areas examined, more than one polyurea layer was applied. The thickness of a single application varied from less than 10 mils to more than 100 mils. When multiple coats of polyurea were present, poor adhesion was found between coats of the polyurea. The top layer of the polyurea could be removed by making a cut in the coating and lightly tugging at an edge. Because the polyurea intercoat adhesion problems were discovered before the project was completed, an attempt was made to improve intercoat adhesion by applying a thin layer of an amber-colored epoxy coating before the application of the additional polyurea coating.
The product data sheet for the polyurea recommended sanding if the surface would be recoated after the 16-hour maximum recoat window. Sanding of a coating roughens the surface, improving the adhesion of subsequently-applied coats. No mention was made of the need for an additional coat of epoxy primer, and no evidence of sanding was found during the field investigation or in the laboratory microscopic examination.

The field laboratory examinations also revealed adhesion problems with the amber epoxy coat. The epoxy layer was also cracked significantly, likely due to its lack of flexibility compared to the polyurea. Hard, inflexible coatings often crack when applied to softer, more flexible coatings.
Polyurea coatings, in some cases, can be prone to adhesion problems. The coating is supplied in two components, which are mixed immediately before they are expelled from the spray gun (and sometimes immediately after). The components begin to harden very quickly, usually in less than a minute. In some cases, depending on the temperature of the material, the temperature of the environment, and the distance between the spray gun and the surface being coated, the material starts to harden before it has adequately flowed into the irregularities on the surface, which can lead to poor adhesion of the coating. The laboratory microscopic examination revealed several areas where the coating appeared to have inadequately flowed (keyed) into the underlying surface.
It was not possible to determine whether the material was unusually prone to poor adhesion, or if the poor adhesion was the result of improper cleaning and surface preparation or application errors. Had the applicators applied the coating in a way that was obviously in conflict with the manufacturer’s application instructions, the manufacturer’s representative likely would have pointed out any errors during the application.
The large volume of water found in the blisters on both the walls and the roof likely came from pinholes in the coating and from the seams. Condensation from the building interior likely traveled through the seams, then under the poorly-adhered coating. Exterior moisture likely also entered from the top, through pinholes, and migrated under the poorly-adhered coating. If the coating had adequate adhesion, water would not have been able to travel under the coating. The blistering is primarily a result of the poor adhesion.
Resolution
The failures of this coating system were too extensive to repair with any reasonable expectation of success. The entire coating system had to be removed and replaced with a flexible acrylic system that had performed adequately on some of the tobacco company’s other fumigation buildings. Because the adhesion of much of the epoxypolyurea-polyurethane coating system was poor, it was relatively easy to remove the system using high-pressure water.
The Journal Of Protective Coatings & Linings ©2013 Technology Publishing Company
 Rick Huntley is the Technical Manager of Consulting Services and a Senior Coatings Consultant for KTA where he has been employed for over 20 years. He is a NACE Certified Coatings Inspector Level 3 (Peer Review) and an SSPC Certified Protective Coatings Specialist. In his current position, Rick is responsible for managing a staff of coating consultants which involves technical review of proposals/reports and project management. He also performs consulting activities that include coating failure analysis, coating condition assessments, coating system recommendations and specification preparation review, and expert witness testimony.